Interchange-X simplifies the process of provisioning new applications every school term/year. All...
Using Interchange-X to Integrate Compass with JAMF School
Interchange-X simplifies the process of updating your mobile device fleet, which is managed via JAMF School. It efficiently converts student and teacher data from Compass into JAMF School users, devices, groups, and profiles. Below is a concise guide to help you through the integration process.
Step 1: Export Data from Compass
-
Log in to your Compass account.
-
Navigate to "Subjects and Classes".

-
Select the "Microsoft SDS Export" (not the v2).

-
A ZIP file will download. Save it locally on your computer.
Step 2: Adjust Interchange-X Settings and Upload Data
-
Open Interchange-X and log in.
-
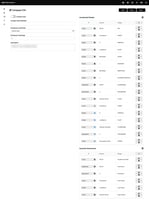
Navigate to the settings panel and configure your Compass-JAMF mapping according to your campus-specific needs.
-
After saving your settings, select: Tasks > Run (choose the mapping you want to run).
-
Browse and select the Compass ZIP file you previously exported.
-
Click "I Confirm" to upload the file and initiate processing.
Step 3: Download Results and Upload to JAMF School
-
Once processing completes, Interchange-X will generate downloadable configuration files ("View").
-
Download these files. You may edit the files or inspect them for accuracy/intent.
-
Log in to your JAMF School account.
-
Navigate to the appropriate import section (users, placeholders).
-
Choose the file(s) to upload the CSV files generated by Interchange-X, depending on requirements and settings (the defaults are generally good; some administrators choose to uncheck automatic group creation if it is known that new groups are unnecessary).
If loading a fresh year/data, the order of imports WITH group creation is: (1) students, (2) teachers, and (3) device placeholders. -
Initiate the import process.
Upon completion, your JAMF School system will automatically have all users, teachers, and classes correctly loaded and associated. Your devices are now ready for integration with Apple School Manager, facilitating a seamless setup for Apple Classroom or JAMF Classroom.


